$179.00 · Equipment included · 12 months of access · Lifetime money-back guarantee
Your rotator cuff recovery, week by week. What to expect after surgery, what to do at home between therapy visits, and the tools to do it.
What to expect after rotator cuff surgery
Before surgery: Get your home ready
You will be doing most things with one arm for weeks. Set up sleep, clothing, meals, and help before the day comes.
In your program: Set up your home and support
Weeks 0 to 6: Protect the repair
Most people wear a sling and avoid using the arm for the first 4 to 6 weeks. Sleeping, showering, and getting dressed are the daily challenge.
In your program: Sleep, dressing, and everyday tasks; Organize your sling, wrap, and essentials
Weeks 4 to 12: Get the shoulder moving
After 4 to 6 weeks, most people progress to active exercises they do on their own at home.
In your program: Passive, assisted, and active movement explained; Pulley movement, step by step; Wand movement, step by step
Weeks 8 to 12 and on: Rebuild strength
At 8 to 12 weeks, physical therapists typically start to introduce strengthening exercises.
In your program: Understand the transition to strengthening; Use ShoulderFit and PosturePT
Months 4 to 6: Get back to your activities
Most patients have a functional range of motion and adequate strength by 4 to 6 months after surgery.
In your program: Prepare for work, lifting, and hobbies; Continue your recovery beyond the course
Typical timing from the American Academy of Orthopaedic Surgeons. Your surgeon and therapist set your own timing, and their instructions come first.
Already seeing a physical therapist?
Therapy visits fill a few hours a week. The rest of your recovery happens at home: the exercises your therapist assigns, sleeping, getting dressed, and managing the sling. The program is your guide for those hours, and your surgeon and therapist decide what you do and when.
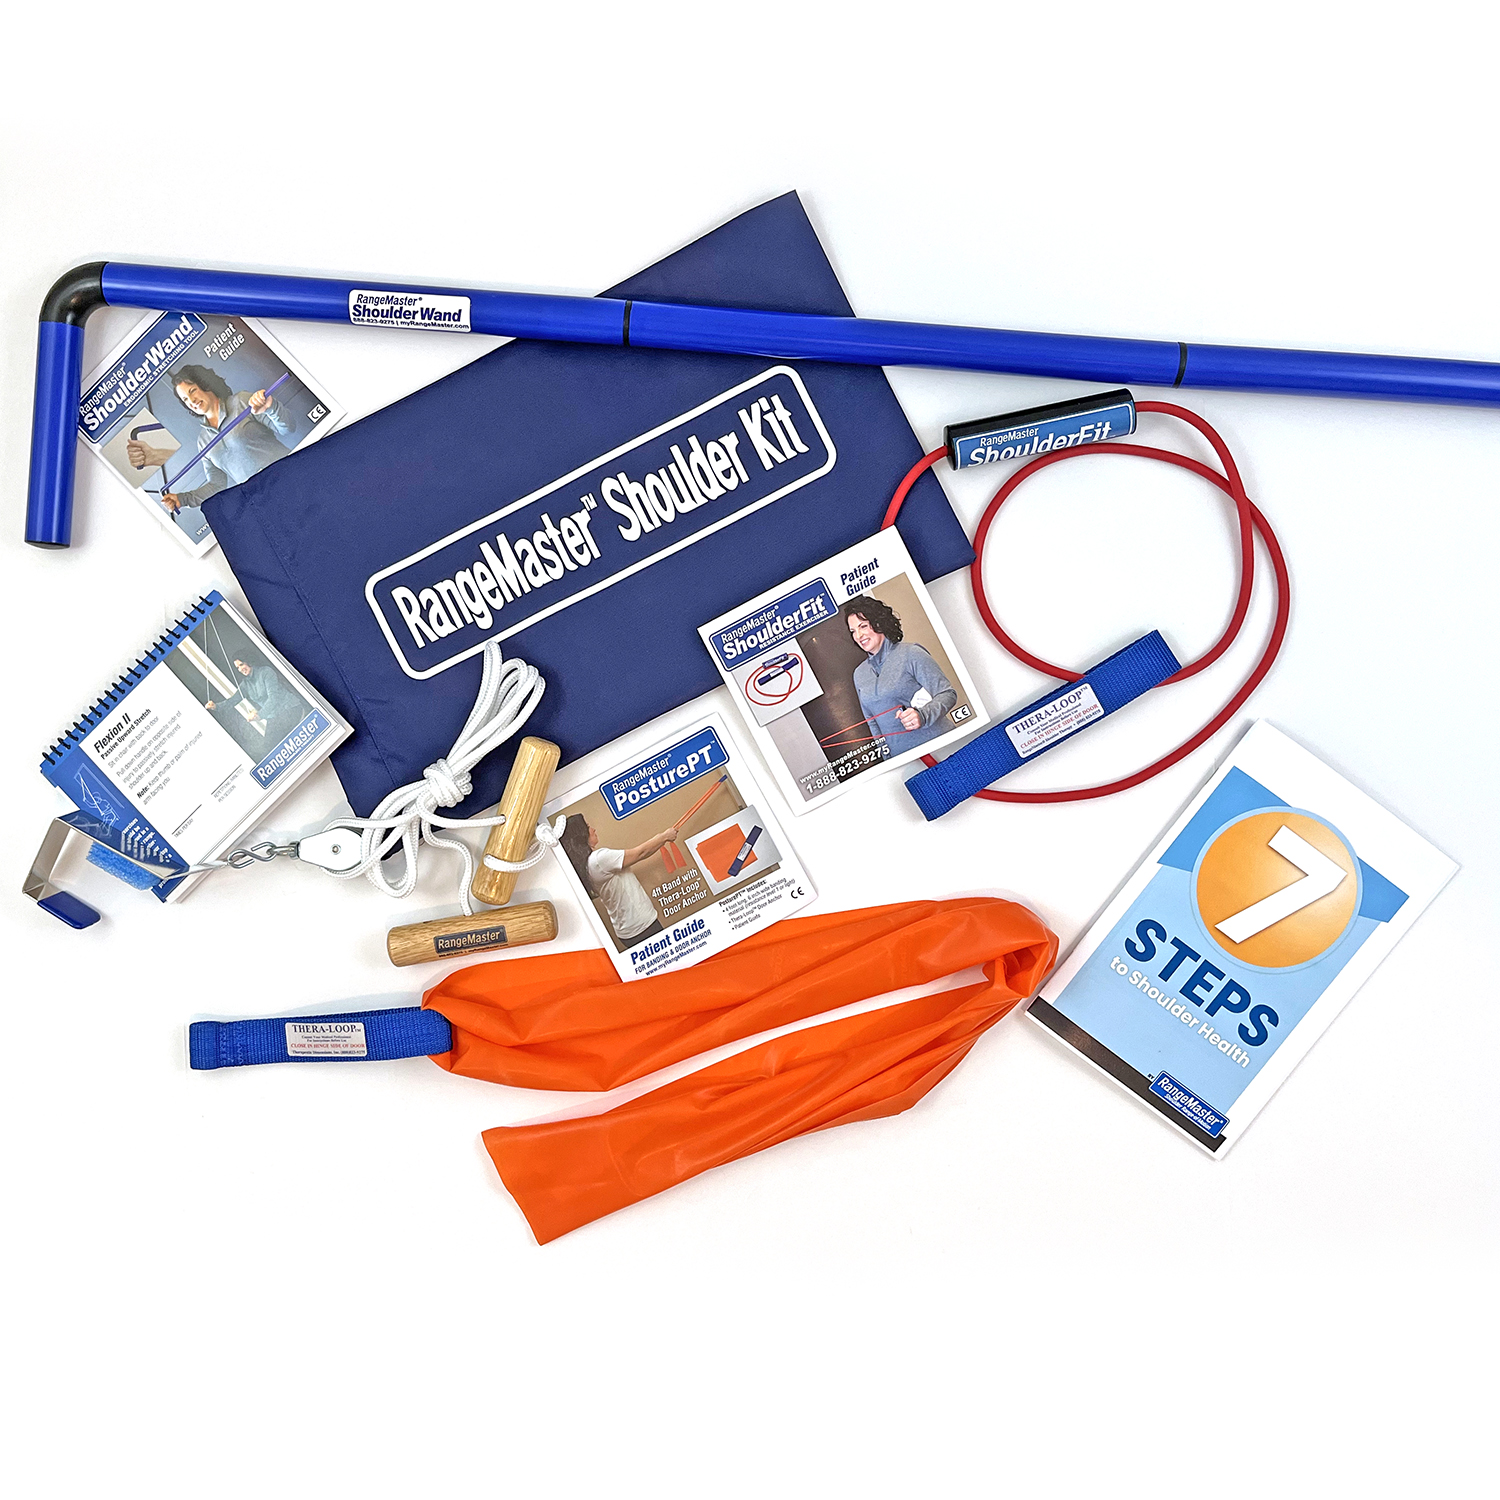
Your purchase includes Shoulder Kit Pro, a Shoulder Compression Wrap, 30 written lessons and equipment tutorials, seven printable resources, and both recovery pathways. Open your lessons after payment while your equipment ships.
Help with movement, strength, and comfort at home
- Pulley: use your more comfortable arm to help the other arm practice controlled reaching.
- ShoulderWand: use both hands for guided movement, including from a supported lying position.
- ShoulderFit: practice resistance exercises for shoulder muscles used in reaching and lifting.
- PosturePT: practice shoulder and upper-back strengthening with a longer resistance band.
- Compression Wrap: hold the included hot or cold gel pack around your shoulder and adjust comfortable compression.
Your care plan determines exercise choices and timing.
Set up your home and support
Make one part of your home easier to use and arrange help for a specific task.
A few changes at home can reduce the number of things you need to organize after surgery. This lesson is a planning exercise. You can complete it before your operation, with a family member, or after returning home with help.
Choose a useful resting space
Pick a place where you can sit, rest, and reach everyday items with your other arm. Follow your surgical team’s positioning instructions when arranging arm support. Put your phone, charger, water, tissues, glasses, and written instructions on a nearby surface. Keep cords and loose rugs away from the route to the bathroom.
- Walk through your usual day and name the items you reach for most.
- Move frequently used items to an easy-to-reach shelf or table.
- Arrange lighting that you can switch on without stretching across the room.
- Choose a home for paperwork, equipment instructions, and appointment notes.
Make help specific
People often want to help and need a clear task. Write down who can handle meals, shopping, transportation, pet care, laundry, and other carrying or lifting. Include a backup person for the first appointments. Ask someone to practice the home arrangement with you so you can notice awkward spots before you need it.
- Transportation: name the driver and record the appointment time.
- Meals: choose easy-to-open containers and portions that are easy to handle.
- Clothing: set out loose items that fit the dressing method you were taught.
- Household work: assign tasks that would require the recovering arm.
Give your equipment a home
Keep the wrap with its instructions and store the exercise tools together in their bag. You can identify the items now and use the movement tutorials when they fit your rehabilitation plan. Keep pathways clear of bands and pulley cords, particularly around children or pets.
- Complete the home setup checklist.
- Share the tasks with your helper.
- Choose one change you can make today.
Try a short home walk-through
Ask your helper to walk through a meal, a clothing change, and a trip to the bathroom with you. Keep the recovering arm in its prescribed position. Notice anything that needs two hands, a high reach, or a heavy pull.
An example help request is: “Please put tomorrow’s lunch in an easy-open container on the middle fridge shelf.” Put the task, helper’s name, and day on the caregiver checklist. You can start with one change today.
A useful setup puts essentials within reach and turns offers of help into specific tasks.
Choose the activities you want back
Turn a broad recovery goal into an everyday task you can track.
A useful goal describes something you want to do. It might be putting a cup on a shelf, washing your hair, carrying groceries, or returning to a favorite hobby. A clear task gives your exercise routine a purpose and makes your progress easier to notice.
Choose one to three tasks
Use your own words. A goal such as "place my empty mug on the middle shelf" gives you a specific movement to discuss and practice. Include the object, height, or time involved when that helps make the task clear.
- Start with one daily task you would like to make easier, such as dressing or preparing a meal.
- If useful, add a work or household task.
- You can also add an activity you enjoy.
- Circle the task that matters most this week.
Describe your starting point
For each task, make a short note about how it goes today. You might need another person, use both hands, choose a lower shelf, or stop after a few minutes. This note becomes your reference point.
Try the task only within your current ability and any instructions you already have. You do not need to test your maximum lift, longest reach, or strongest pull to establish a starting point.
- What part of the task feels difficult?
- What change makes it easier?
- How does the shoulder feel later that day?
- What would a small useful improvement look like?
Review the same task
Pick a regular time to look back at your notes. Use similar conditions so the comparison is meaningful. A lighter grocery bag or a different shelf height changes the task.
A practical record could read: "Used both hands on Monday; used one hand comfortably for the same empty cup on Friday." Progress may also mean fewer pauses, better control, or less help. Share persistent difficulties with your therapist so your routine can address them.
A goal you can compare
Example: “Put the same empty mug on the middle shelf with comfortable control.” In your starting note, record whether you used one hand, both hands, or help. Later, compare that same mug and shelf.
Use the activity worksheet to describe your own task. You can write down a goal without testing your strongest effort. A good record gives you a clear question for your next appointment and a practical reason to keep up your routine.
Write one to three activity goals and choose one priority for this week.
Surgical Recovery
Preparing for or recovering from rotator cuff repair surgery.
Start here
- Understand your recovery stages
- Set up your home and support
Make daily life easier
- Sleep, dressing, and everyday tasks
- Organize your sling, wrap, and essentials
Understand movement
- Passive, assisted, and active movement explained
- Prepare your pulley and wand
Practice with confidence
- Pulley movement, step by step
- Wand movement, step by step
Build strength
- Understand the transition to strengthening
- Use ShoulderFit and PosturePT
Return to your activities
- Prepare for work, lifting, and hobbies
- Continue your recovery beyond the course
Non-Surgical Recovery
Managing your shoulder without surgery and building a practical home routine.
Start here
- Understand your shoulder problem
- Choose the activities you want back
Make daily life easier
- Adjust activities that aggravate your shoulder
- Build a routine you can repeat
Understand movement
- Find a manageable movement starting point
- Help your arm move with the ShoulderWand
Practice with confidence
- Practice controlled shoulder movement
- Begin resistance work with ShoulderFit
Build strength
- Build shoulder and upper-back capacity
- Adjust resistance and record your response
Return to your activities
- Practice the tasks that matter to you
- Keep a sustainable shoulder routine
Equipment guides
- Meet your kit
- Set up your pulley
- Use your ShoulderWand
- Use ShoulderFit
- Use PosturePT
- Use your compression wrap
All lessons are available immediately with your purchase. Use printable checklists and a routine tracker to organize your week, revisit instructions for a full year, and contact RangeMaster for education and product support.
Try it with nothing to lose
RangeMaster’s unconditional money-back guarantee covers this program. If you are unsatisfied for any reason, contact us and we will make it right with a replacement or a full refund. A full program refund ends lesson access.